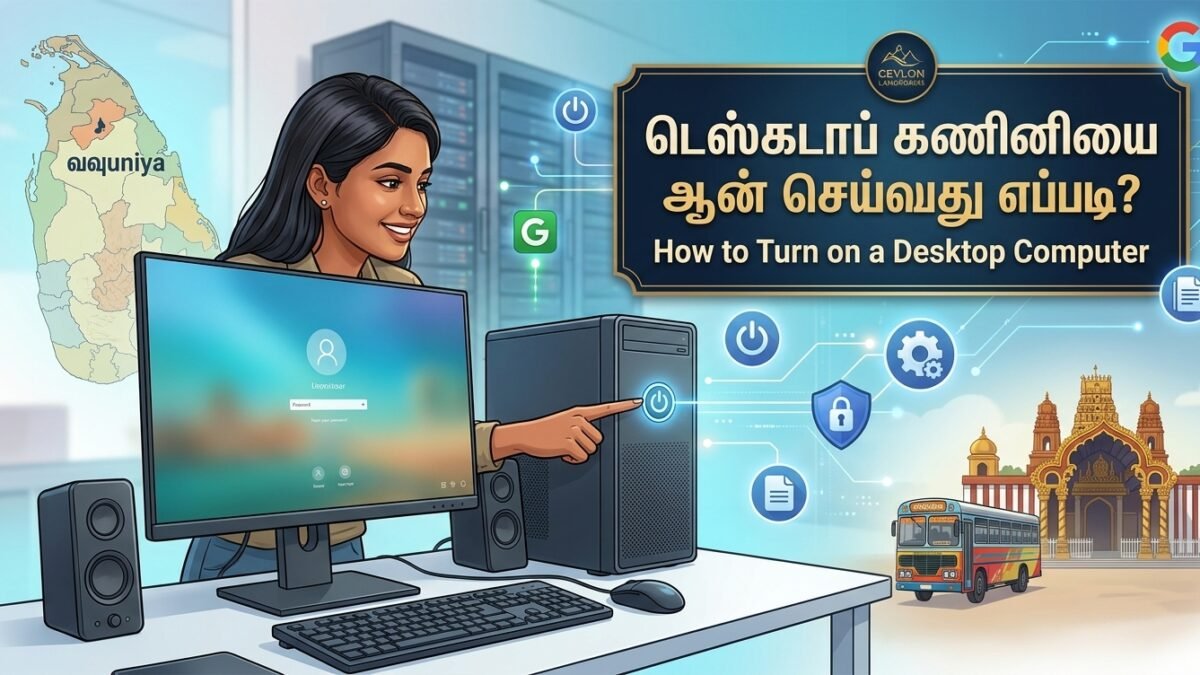

How to Turn on a Desktop Computer
ஒரு டெஸ்க்டாப் கணினியை (Desktop Computer) ஆன் செய்வது என்பது வெறும் ஒரு பட்டனை அழுத்துவது மட்டுமல்ல; மின்சார விநியோகத்தைச் சரிபார்த்தல், கேபிள்களை இணைத்தல் மற்றும் இயங்குதளம் (Operating System) சரியாகத் தொடங்குவதை உறுதிசெய்தல் எனப் பல படிநிலைகளை உள்ளடக்கியது.
நீங்கள் கணினியை முதன்முதலாகப் பயன்படுத்துபவராக இருந்தாலும் சரி, அல்லது கணினி ஆன் ஆகாத போது சரிசெய்ய நினைத்தாலும் சரி, டெஸ்க்டாப் கணினியை ஆன் செய்வதற்கான முழுமையான வழிகாட்டி இதோ.
1. டெஸ்க்டாப் கணினியின் பாகங்களும் கேபிள் இணைப்புகளும்
கணினியை ஆன் செய்வதற்கு முன், அனைத்து முக்கியப் பாகங்களும் சரியாக இணைக்கப்பட்டுள்ளனவா என்பதைச் சரிபார்க்க வேண்டும்.
                    [ டெஸ்க்டாப் கணினி இணைப்பு கட்டமைப்பு ]
                                       │
        ┌──────────────────────────────┼──────────────────────────────┐
        ▼                              ▼                              ▼
 [ சிபியு டவர் (PC Tower / Case) ]    [ மானிட்டர் (Monitor Screen) ]    [ சாதனங்கள் (Peripherals) ]
 • பவர் சப்ளை யூனிட் (PSU Switch)     • மானிட்டர் பவர் கேபிள்          • விசைப்பலகை (Keyboard)
 • முன்பக்க பவர் பட்டன் (Power Button) • வீடியோ கேபிள் (HDMI / DP)      • மவுஸ் (Mouse)
அத்தியாவசிய சரிபார்ப்புப் பட்டியல் (Checklist):
- மெயின் பவர் கேபிள்கள் (Power Cables): கணினி பெட்டிக்கும் (CPU Tower) மற்றும் மானிட்டருக்கும் தனித்தனியாக மின்சாரக் கேபிள்கள் இணைக்கப்பட்டிருக்க வேண்டும்.
- வீடியோ கேபிள் (HDMI / DisplayPort / VGA): கணினியிலிருந்து திரைக்குக் காட்சிகளைக் கொண்டுசெல்லும் கேபிள்.
- விசைப்பலகை (Keyboard) & மவுஸ் (Mouse): USB போர்ட்டுகளில் சரியாகச் செருகப்பட்டிருக்க வேண்டும்.
2. கணினியை ஆன் செய்வதற்கு முந்தைய சரிபார்ப்புகள்
கணினி ஆன் ஆகாமல் போவதற்குப் பெரும்பாலான காரணம் ஏதேனும் ஒரு சுவிட்ச் அல்லது கேபிள் விடுபட்டிருப்பதே ஆகும். எனவே பின்வரும் வரிசைமுறையைப் பின்பற்றவும்:
📊 மின் இணைப்பு மற்றும் சுவிட்ச் சரிபார்ப்பு அட்டவணை
| இணைப்புப் புள்ளி | சரிபார்க்க வேண்டிய அமைப்பு | சரியான நிலை | பொதுவான தவறு |
| சுவர் சுவிட்ச் / Surge Protector | பிரதான மின்சாரப் பலகை | ON நிலையில் இருக்க வேண்டும் | எக்ஸ்டென்ஷன் பாக்ஸ் சுவிட்ச் ஆஃப் செய்யப்பட்டிருப்பது |
| சிபியு பின்புற சுவிட்ச் (PSU Switch) | CPU-வின் பின்புறம் உள்ள சிறிய சுவிட்ச் | | (ON) பக்கத்தில் அழுத்தப்பட்டிருக்க வேண்டும் | O (OFF) பக்கத்தில் இருப்பது |
| வீடியோ கேபிள் (Display Cable) | HDMI அல்லது DisplayPort | கிராபிக்ஸ் கார்டு அல்லது மதர்போர்டு போர்ட்டில் | கேபிள் லேசாகக் கழன்று இருப்பது |
| மானிட்டர் பவர் | திரையின் மின் இணைப்பு | அடாப்டர் மற்றும் பிளக் சரியாக இணைக்கப்படல் | மின்சாரம் வராமல் இருப்பது |
1.சுவர் மற்றும் எக்ஸ்டென்ஷன் சுவிட்சை ஆன் செய்தல்:படி 1: முதன்மை மின்சாரம்.
சுவரில் உள்ள மெயின் சுவிட்ச் மற்றும் நீங்கள் பயன்படுத்தும் பிளக் பாக்ஸ் (Surge Protector / UPS) சுவிட்சை ஆன் செய்யவும்.
2.CPU பின்புற ராக்கர் சுவிட்சைச் சரிபார்த்தல்:படி 2: சிபியு பவர் சப்ளை.
கணினி டவரின் பின்புறம் பவர் கேபிள் இணையும் இடத்திற்கு அருகில் ஒரு சிறிய ராக்கர் சுவிட்ச் இருக்கும். அதில் | (கோடு) உள்ள பகுதியை அழுத்த வேண்டும் (O என்பது ஆஃப் நிலை).
3.HDMI / DisplayPort கேபிளைச் சரிபார்த்தல்:படி 3: காட்சித் தொடர்பு.
மானிட்டருக்கும் கணினிக்கும் இடையே உள்ள வீடியோ கேபிள் இருபுறமும் இறுக்கமாகப் பொருத்தப்பட்டுள்ளதா என்பதை உறுதிப்படுத்தவும்.
3. டெஸ்க்டாப் கணினியை ஆன் செய்யும் செயல்முறை (Step-by-Step)
மின்சார இணைப்புகள் சரியாக இருப்பதை உறுதிசெய்த பிறகு, கணினியை ஆன் செய்யப் பின்வரும் படிகளைப் பின்பற்றவும்:
                    [ கணினி தொடங்குவதற்கான படிநிலைகள் ]
                                  │
    ┌─────────────────────────────┴─────────────────────────────┐
    ▼                                                           ▼
[ 1. மானிட்டரை ஆன் செய்தல் ]                 [ 2. CPU பவர் பட்டனை அழுத்துதல் ]
• திரையின் கீழ்/பின்புற பட்டன்.              • பவர் குறியீடு (⏻) கொண்ட பட்டன்.
• ஒளி விளக்கு எரியும்.                      • 1 வினாடி அழுத்தி விடவும்.
                                  │
                                  ▼
                    [ 3. இயங்குதளம் தொடங்குதல் ]
                    • விசிறிகள் சுழலும், விளக்குகள் ஒளிரும்.
                    • விண்டோஸ் (Windows) லோகோ தோன்றும்.
                    • லாகின் திரை / டெஸ்க்டாப் தயாராகும்.
படி 1: முதலில் மானிட்டரை ஆன் செய்யவும்
- மானிட்டரின் அடிப்பகுதியிலோ, வலது பக்கத்திலோ அல்லது பின்புறத்திலோ உள்ள பவர் பட்டனை (Monitor Power Button) ஒருமுறை அழுத்தவும்.
- திரையில் சிறிய ஒளி விளக்கு (Blue/Green LED) எரியும். திரையில் “No Signal” அல்லது உற்பத்தியாளர் பெயர் (Dell, HP, LG போன்றவை) தோன்றும்.
படி 2: சிபியு-வின் பிரதான பவர் பட்டனைக் கண்டறிதல்
- கணினி டவரின் முன்பக்கத்திலோ அல்லது மேற்பகுதியிலோ பவர் பட்டன் அமைந்திருக்கும்.
- இதன் மீது சர்வதேச பவர் குறியீடான ( ⏻ ) சின்னம் பொறிக்கப்பட்டிருக்கும்.
படி 3: பவர் பட்டனை ஒருமுறை மட்டும் அழுத்துதல்
- பவர் பட்டனை சுமார் 1 வினாடி மட்டும் அழுத்தமாக அழுத்தி உடனே விரலை எடுத்துவிடவும்.
- (முக்கியக் குறிப்பு: பட்டனைத் தொடர்ந்து 5-10 வினாடிகள் அழுத்திப் பிடித்துக் கொண்டிருக்கக் கூடாது; அப்படிப் பிடித்தால் கணினி உடனே ஆஃப் ஆகிவிடும்).
படி 4: கணினி தொடங்குவதை உறுதிசெய்தல்
பட்டனை அழுத்திய 2 வினாடிகளில்:
- கணினியின் உட்புறக் கூலிங் ஃபேன் (Fan) சுழலும் மெல்லிய சத்தம் கேட்கும்.
- முன்பக்கத்தில் உள்ள எல்.இ.டி (LED) விளக்குகள் ஒளிரும்.
- விசைப்பலகை மற்றும் மவுஸில் ஒளி விளக்குகள் மின்னும்.
படி 5: திரையில் லாகின் செய்தல்
- சிறிது நேரத்தில் மானிட்டரில் Windows / Mac லோகோ தோன்றி இயங்குதளம் ஏற்றப்படும் (Loading).
- லாக் ஸ்கிரீன் (Lock Screen) வந்ததும் உங்கள் Password அல்லது PIN எண்ணை உள்ளிட்டு என்டர் (Enter) அழுத்தவும்.
- இப்போது உங்கள் கணினி முழுமையாக ஆன் ஆகிப் பயன்படுத்தத் தயாராகிவிடும்.
4. கணினி ஆன் ஆகாவிட்டால் என்ன செய்வது? (Troubleshooting)
🔍 சிக்கல்களும் உடனடித் தீர்வுகளும்
| ஏற்படும் பிரச்சனை | சாத்தியமான காரணம் | செய்ய வேண்டிய தீர்வு |
| விளக்குகளோ, சத்தமோ இல்லை (முழுமையாக அமைதி) | மின்சாரம் வரவில்லை, பவர் கேபிள் தளர்ந்துள்ளது. | பவர் கேபிளை நன்றாக அழுத்தவும்; பின்புற PSU சுவிட்ச் | நிலையில் உள்ளதா எனப் பார்க்கவும். |
| CPU ஆன் ஆகிறது, ஆனால் திரையில் படம் இல்லை (“No Signal”) | வீடியோ கேபிள் தவறான போர்ட்டில் உள்ளது அல்லது RAM தளர்ந்துள்ளது. | HDMI கேபிளை மதர்போர்டில் போடாமல், கீழே உள்ள தனியான கிராபிக்ஸ் கார்டு போர்ட்டில் மாற்றவும். |
| கணினி தொடர்ந்து தானாகவே ரீஸ்டார்ட் ஆகிறது | ரேம் (RAM) அல்லது வெப்பப் பிரச்சனை. | கணினியை ஆஃப் செய்துவிட்டு, RAM கார்டைக் கழற்றி மீண்டும் சரியாகப் பொருத்தவும். |
5. கணினியைச் சரியான முறையில் ஆஃப் (Shut Down) செய்வது எப்படி?
கணினியை எப்போதும் சுவரில் உள்ள சுவிட்சை நேரடியாக அணைத்தோ அல்லது ஒயரைப் பிடுங்கியோ ஆஃப் செய்யக் கூடாது. அவ்வாறு செய்தால் உங்கள் கோப்புகள் மற்றும் விண்டோஸ் ஃபைல்கள் சேதமடையக்கூடும்.
- Windows 10 / 11:
- திரையின் இடது கீழ் மூலையில் உள்ள Start மெனுவைக் கிளிக் செய்யவும்.
- Power குறியீட்டைக் கிளிக் செய்யவும்.
- அதில் Shut down என்பதைத் தேர்ந்தெடுக்கவும்.
- கணினியின் விளக்குகள் அனைத்தும் முழுமையாக அணைந்த பிறகு, கடைசியாகச் சுவர் சுவிட்சை ஆஃப் செய்யவும்.
How to Turn on a Desktop Computer
Powering on a desktop computer may seem like pressing a single button, but behind that physical push lies an orchestrated series of electrical verifications, firmware handoffs, and software initializations. Whether you are setting up a personal workspace for the first time, troubleshooting a system that fails to respond, or looking to understand what happens inside the chassis when power flows, this comprehensive guide covers every stage of the process.
1. Anatomy of a Desktop Setup: Core Components & Connections
Before initiating power, ensure that every component in the desktop ecosystem is correctly positioned, seated, and connected. Unlike all-in-one laptops, standard desktop computers rely on modular, discrete components.
                    [ Standard Desktop Power & Data Layout ]
                                       │
        ┌──────────────────────────────┼──────────────────────────────┐
        ▼                              ▼                              ▼
 [ Main PC Tower / Case ]      [ Display Monitor ]         [ Essential Peripherals ]
 • Power Supply Unit (PSU)     • Power Cable (Wall/Surge)   • Keyboard (USB/Wireless)
 • Power Switch (Front/Top)    • Display Cable (HDMI/DP)    • Mouse (USB/Wireless)
 • Motherboard & Components    • Monitor Power Button       • Audio/Network (Optional)
Essential Hardware Checklist
- The Computer Tower (Case / Chassis): Houses the central processing unit (CPU), motherboard, memory (RAM), storage drives (SSD/HDD), and the Power Supply Unit (PSU).
- The Monitor (Display Screen): Outputs the visual user interface. It requires its own separate power feed and a display data cable connected directly to the tower.
- Power Cables (IEC C13 Standard): Heavy-duty, three-prong power cords running from the wall outlet or surge protector into the PSU and the monitor.
- Video Cables: High-Definition Multimedia Interface (HDMI), DisplayPort (DP), or legacy connections (DVI/VGA) linking the PC’s display output to the monitor.
- Peripherals: Keyboard and mouse connected via USB ports or synced wirelessly using a 2.4 GHz RF dongle or Bluetooth.
2. Pre-Power Verification: Cable Checks and PSU Switch
A frequent reason desktop computers fail to turn on is an unseated cable or a deactivated secondary switch. Perform these quick inspections before touching the front power button.
📊 Connection Verification Matrix
| Connection Point | Required Cable / Setting | Proper State | Common Mistake |
| Wall / Surge Protector | AC Wall Socket / Surge Bar | Switched ON; status LED lit | Surge protector switch is flipped off |
| Tower Power Inlet | 3-Prong IEC Power Cord | Firmly pushed into the PSU socket | Cable loose or partially seated |
| PSU Rocker Switch | Integrated toggle on rear of PC | Switched to **` | (ON)**, notO` (OFF) |
| Video Cable (Dedicated GPU) | HDMI or DisplayPort | Connected to the lower graphics card ports | Plugged into motherboard video ports by mistake |
| Monitor Power Inlet | Monitor Power Cable / Adapter | Securely plugged into wall & monitor | Power adapter brick unseated |
1.Verify Main Power at the Wall:Step 1: Electrical Source.
Ensure your wall outlet or surge protector is functional. If using an uninterruptible power supply (UPS) or surge bar, ensure its master power switch is illuminated and turned on.
2.Check the Rear Power Supply (PSU) Rocker Switch:Step 2: Chassis Power Line.
Inspect the back of the computer chassis near the power cord receptacle. Locate the rocker switch. Flip it so that the | (line) symbol is pressed down. The O (circle) symbol represents power disconnect.
3.Inspect the Video Cable Routing:Step 3: Signal Transmission.
Ensure the HDMI or DisplayPort cable runs between the monitor and the computer. Crucial rule: If your desktop has a dedicated graphics card (GPU) located horizontally lower down the case, connect the display cable there, rather than to the motherboard’s upper vertical ports.
4.Verify Keyboard and Mouse Connection:Step 4: Input Devices.
Plug your keyboard and mouse into standard USB Type-A ports on the rear I/O shield (preferred for stability) or front panel.
3. Step-by-Step: Turning On Your Desktop Computer
Once the physical cabling and power supplies are verified, power on your system using the correct sequence.
                    [ Proper Power-On Sequence ]
                                  │
    ┌─────────────────────────────┴─────────────────────────────┐
    ▼                                                           ▼
[ 1. Power On Monitor First ]               [ 2. Press PC Case Power Button ]
• Press monitor power button.               • Firm, brief press (1 second).
• Verify LED indicator lights up.           • Listen for fan spin & lights.
                                  │
                                  ▼
                    [ 3. System Initialization ]
                    • Motherboard POST checks hardware.
                    • OS loads (Windows/macOS/Linux).
                    • Login / Desktop screen appears.
Step 1: Power On the Monitor First
Turn on your monitor before powering the computer tower.
- Locate the power button on the monitor (typically on the bottom edge, bottom-right corner, or as a tactile joystick on the rear panel).
- Press the button once. An indicator light (blue, green, or amber) will illuminate.
- The screen may briefly show a manufacturer logo (e.g., Dell, ASUS, LG, Samsung) followed by “No Signal” or “Searching for Signal.” This is normal; it indicates the monitor is waiting for the computer to send video data.
Step 2: Locate the Tower Power Button
Find the main power button on the computer case:
- On pre-built brand systems (HP, Dell, Lenovo), it is usually on the upper-front face.
- On custom gaming towers, it is commonly situated on the top panel alongside USB ports and audio jacks.
- Look for the international Power Symbol (a circle broken by a vertical line at the top: ⏻).
Step 3: Press and Release the Power Button
- Give the power button a firm, single press for about 1 second, then release it.
- Do not hold the button down: Holding the power button for 4–10 seconds triggers a forced emergency shutdown, which will prevent the PC from booting or immediately turn it back off.
Step 4: Observe Physical Indicators
Within two seconds of pressing the button, you should notice:
- Audio cues: Internal cooling fans (CPU, chassis, graphics card) spinning up, producing a gentle whirring sound.
- Visual cues: Power LED on the front/top panel illuminating; internal RGB components lighting up.
- Peripherals: Keyboard backlights or optical mouse sensors flashing as the USB ports receive power.
4. What Happens During Boot: POST, BIOS/UEFI, and OS Loading
Understanding the startup phases helps demystify the boot process and allows you to pinpoint where an issue lies if the system fails to reach the desktop.
                     [ Internal Boot Hierarchy ]
                                  │
                                  ▼
                 [ 1. Power-On Self-Test (POST) ]
                 • Checks CPU, RAM, GPU, Storage.
                 • Verifies essential hardware health.
                                  │
                                  ▼
                  [ 2. UEFI / BIOS Initialization ]
                  • Reads configuration settings.
                  • Identifies bootable drives (NVMe/SSD).
                                  │
                                  ▼
                  [ 3. Bootloader Execution ]
                  • Windows Boot Manager / GRUB loads.
                  • Kernel initializes drivers & services.
                                  │
                                  ▼
                    [ 4. Operating System Login ]
                    • Lock screen & User profile loaded.
Phase 1: The Power-On Self-Test (POST)
Immediately after receiving current from the PSU, the motherboard runs a built-in diagnostic sequence called the Power-On Self-Test (POST).
- The system checks whether the processor is operational, verifies system memory (RAM), confirms the graphics card is present, and scans connected storage drives.
- On older legacy systems, a single short “beep” from an internal speaker signifies a successful POST. Modern motherboards use diagnostic LEDs (Debug LEDs marked CPU, DRAM, VGA, BOOT) or a two-digit digital display to show real-time status.
Phase 2: BIOS/UEFI Firmware Handoff
Once POST completes successfully:
- The motherboard’s UEFI (Unified Extensible Firmware Interface) or legacy BIOS searches the configured Boot Priority Order.
- It locates the primary drive containing the Operating System (typically a high-speed NVMe M.2 SSD or 2.5-inch SATA SSD).
Phase 3: Operating System Loading
- The UEFI hands control to the OS bootloader (e.g., Windows Boot Manager, macOS bootloader, or GRUB for Linux).
- The screen displays the system manufacturer logo or the Windows logo accompanied by a spinning loading animation.
- System kernels, hardware device drivers, background services, and security protocols load into memory.
Phase 4: User Authentication and Desktop
- The Lock Screen appears displaying the current time, network status, and user profiles.
- Enter your Password, PIN, or use biometric authentication (e.g., Windows Hello fingerprint/camera) to log in.
- Your personalized desktop environment, taskbar, background applications, and desktop icons will populate. The computer is now ready for use.
5. Comprehensive Troubleshooting: What to Do When It Doesn’t Turn On
If your desktop does not boot as expected, categorize the symptoms using the guide below to resolve the issue quickly.
🔍 Diagnostic Matrix: Symptoms & Solutions
| Symptom Category | Visible Behavior | Probable Root Cause | Immediate Action |
| Complete Power Failure | No lights, no fan spin, dead silence | Unplugged cable, wall switch off, PSU switch off, tripped breaker | Check surge protector switch, verify rear PSU rocker switch is set to |. Test another wall outlet. |
| Fans Spin, No Display | Tower lights up and fans spin, but monitor screen stays black / “No Signal” | Video cable in wrong port, monitor input source incorrect, RAM unseated | Move HDMI/DP cable to dedicated GPU ports. Change monitor input source via monitor menu. Reseat RAM sticks. |
| Stuck on Motherboard Logo | Freezes on manufacturer splash screen (e.g., Dell, ASUS, MSI) | Corrupted boot sector, failing drive, or faulty USB drive attached | Disconnect external USB flash drives and external hard drives; restart the PC. |
| Boot Loop (Restarts constantly) | Starts for 3–5 seconds, shuts off, and restarts repeatedly | RAM configuration issue, overheating, loose 24-pin power cable | Open case, reseat RAM into primary slots (A2/B2), verify CPU cooler is mounted firmly. |
| BSOD / Blue Screen on Startup | Blue screen with error codes (e.g., INACCESSIBLE_BOOT_DEVICE) | Driver conflict, corrupted Windows update, bad storage sector | Boot into Windows Recovery Mode (hold Shift while restarting) and run Startup Repair. |
Step-by-Step Resolution for Common Scenarios
Scenario A: The PC Shows Zero Signs of Life
- Ensure the power cord is pushed all the way into the power supply unit until it cannot go deeper.
- Confirm the rear rocker switch is set to the
|position. - Plug a known working device (like a desk lamp or phone charger) into the exact wall outlet or surge strip to confirm power is flowing.
- If using a modular PSU, confirm all internal cables (24-pin ATX, 8-pin EPS CPU) are securely clipped into the motherboard.
Scenario B: The PC Turns On, But the Screen Stays Black (“No Signal”)
- Check Video Input Channel: Access the monitor’s built-in menu using its buttons and verify the input source matches the cable in use (e.g., manually select HDMI 1 or DisplayPort 1 rather than relying on Auto-Detect).
- Dedicated GPU vs. Integrated Graphics: If your PC case has horizontal expansion slots with display ports near the middle/bottom of the rear panel, your monitor must be plugged there. Plugging into the vertical motherboard ports at the top when a dedicated GPU is installed will output no video on most systems.
- Reseat the RAM: Turn off the power, disconnect the main power cable, open the side panel, and unclip your RAM modules. Push them back down firmly into their slots until the side latches click automatically.
6. Proper Shutdown, Restart, and Sleep Procedures
Powering down or suspending your computer correctly protects file integrity, prevents file system corruption, and prolongs SSD life.
                    [ Desktop Power State Management ]
                                     │
      ┌──────────────────────────────┼──────────────────────────────┐
      ▼                              ▼                              ▼
[ Shut Down (Full Power Off) ]  [ Sleep Mode (Low Power) ]     [ Restart (Reboot) ]
• Saves system state to disk.    • Keeps session in RAM.        • Clears RAM completely.
• Closes all applications.       • Wakes up in 1–2 seconds.     • Reloads OS kernel freshly.
• Safest for hardware changes.   • Ideal for short breaks.      • Best for updates & fixes.
1. Graceful Operating System Shutdown (Recommended)
Never power off a running desktop by flipping the wall switch or pulling the cord while Windows/macOS is running. This can corrupt open files, registry entries, and cached disk data.
- Windows 11 / 10: Click the Start Menu (
Windows Icon) ➔ Click the Power icon ➔ Select Shut down. - macOS: Click the Apple Menu () in the top-left corner ➔ Select Shut Down… ➔ Confirm.
- Linux (Ubuntu/Fedora): Open the system tray in the top-right corner ➔ Select the Power icon ➔ Click Power Off.
2. Sleep Mode vs. Shut Down
- Sleep Mode: Places the computer into a low-power state, keeping your open documents and applications suspended in RAM. The fans turn off, and the power LED may pulse gently. Waking the system requires tapping a key on the keyboard or clicking the mouse. Use Sleep Mode when stepping away for minutes or hours during the workday.
- Shut Down: Completely drains active power from system components, flushes temporary caches, and allows cool-down. Use full shutdown at the end of the day or before opening the computer chassis for maintenance.
3. Emergency Hard Shutdown (Only When Frozen)
If your operating system completely freezes, the mouse cursor is unresponsive, and keyboard commands (Ctrl + Shift + Esc or Ctrl + Alt + Delete) do not work:
- Press and hold the front chassis Power Button continuously for 5 to 10 seconds.
- The motherboard will forcibly cut power to the hardware components.
- Wait 10–15 seconds before pressing the button again to turn the computer back on. Run a disk scan or system check once booted.
7. Best Practices for Long-Term System Health
- Use a Dedicated Surge Protector or UPS: Desktop power supplies are sensitive to voltage spikes and sudden blackouts. A Line-Interactive Uninterruptible Power Supply (UPS) provides backup battery power, giving you time to save your work and execute a safe shutdown during power cuts.
- Maintain Adequate Ventilation: Keep the desktop tower elevated at least a few inches off thick carpets to ensure the power supply fan (usually located at the bottom of the case) can draw in cool, unobstructed air.
- Keep Firmware and Drivers Updated: Periodically update your operating system and motherboard UEFI firmware to maintain hardware compatibility, fast boot times, and system stability.
Following this structured process ensures your desktop computer powers on smoothly, operates efficiently, and remains protected against electrical or data issues throughout its lifespan.
மேலதிக தகவல்களுக்கு மாற்றம் செய்திகள் இணையத்தளத்தினுள் பிரவேசியுங்கள்.
மேலதிக தகவல்களை உடனுக்குடன் பெற்றுக்கொள்ள மாற்றம் செய்திகள் முகநூல் பக்கத்தை பின்தொடரவும்.